Lighting Techniques for Stunning Photography
Light is the essence of photography—the very word "photography" comes from Greek words meaning "drawing with light." Understanding how to work with light is perhaps the most crucial skill any photographer can develop. In this comprehensive guide, we'll explore various lighting techniques that can dramatically elevate your photography.
Understanding the Quality of Light
Before diving into specific techniques, it's important to understand the basic characteristics of light:
- Hard light creates strong, defined shadows and high contrast. It's typically produced by small, direct light sources like the midday sun or a bare flash.
- Soft light creates gentle, diffused shadows and lower contrast. It comes from large light sources or hard light that has been diffused, like an overcast sky or a softbox.
- Direction of light affects how textures and shapes are revealed. Front lighting minimizes texture, while side lighting emphasizes it.
- Color temperature ranges from warm (golden, reddish) to cool (blue), affecting the mood of your image.
Natural Light Techniques
Golden Hour
The hour after sunrise and before sunset provides some of the most beautiful light for photography. During golden hour, the sun is low in the sky, creating a warm, golden glow with soft, directional light. Shadows are longer but softer than midday, creating dimensionality without harsh contrast.
For portraits during golden hour, position your subject so the light comes from behind them (backlight) for a beautiful rim light effect, or from the side for more dramatic modeling of facial features.
Blue Hour
Blue hour occurs just before sunrise and after sunset when the sky takes on a deep blue hue. This time is especially magical for urban and landscape photography, as artificial lights begin to glow against the blue backdrop. The soft, even light during blue hour is also excellent for portraits, creating a moody, atmospheric quality.
Overcast Days
Don't put your camera away on cloudy days! Overcast skies act as a giant softbox, creating even, diffused light that's perfect for portraits and detail photography. Colors appear more saturated without harsh shadows, and you can shoot comfortably throughout the day without worrying about changing light conditions.
Window Light
Window light is one of the most beautiful and accessible light sources for indoor photography. Position your subject at a 45-degree angle to a large window for classic portrait lighting. The larger the window and the closer your subject is to it, the softer the light will be.
For more dramatic lighting, try positioning your subject perpendicular to the window, creating Rembrandt-style lighting with one side of the face illuminated and a characteristic triangle of light on the shadowed side.
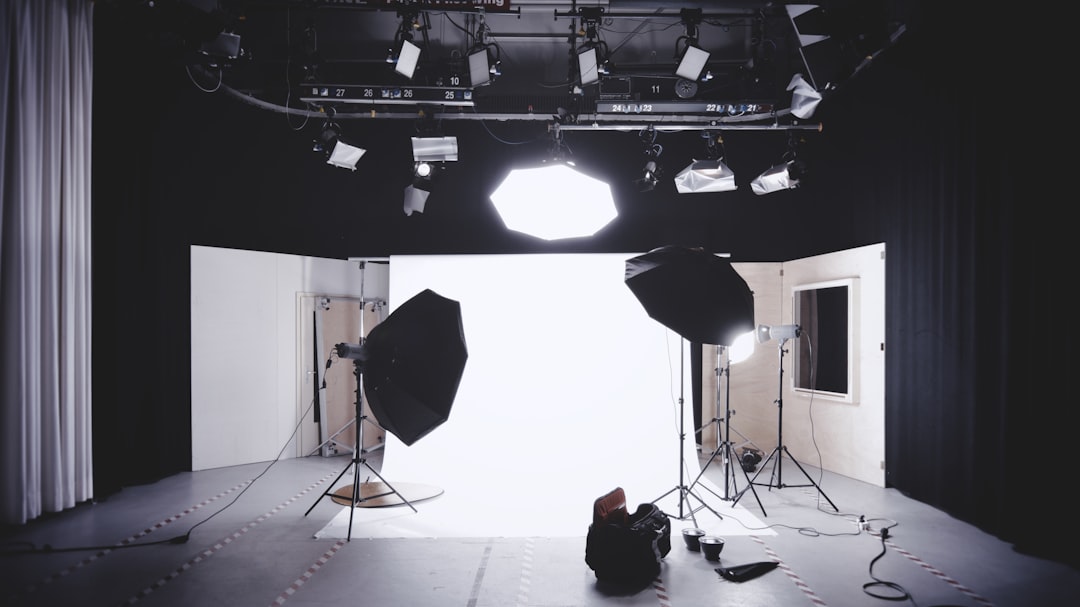
Artificial Light Techniques
Basic One-Light Setup
A single light source, whether a speedlight or studio strobe, can be incredibly versatile. For a basic portrait setup, position your light at a 45-degree angle to your subject, slightly above eye level. This creates pleasing shadows that reveal facial contours while maintaining enough illumination on the shadowed side.
Modify your light with a softbox or umbrella for softer results, or use a bare flash with a grid for more dramatic, focused lighting.
Two-Light Setup
Adding a second light gives you more control over your lighting ratio (the difference between highlight and shadow areas). A common two-light setup includes:
- Key light: Your main light source, positioned at a 45-degree angle to your subject
- Fill light: A softer light positioned opposite the key light to fill in shadows, typically set to lower power (1-2 stops less than the key light)
This setup provides dimensionality while maintaining detail in shadow areas.
Three-Point Lighting
The classic three-point lighting setup adds a third light to separate your subject from the background:
- Key light: Your main light source
- Fill light: Fills in shadows created by the key light
- Rim/hair light: Positioned behind the subject to create separation from the background and add dimension
This setup is the foundation of portrait and video lighting, providing a balanced, three-dimensional look.
Background Lighting
Don't forget about your background! Adding a light to illuminate the background can create depth and interest. For a gradient effect, position the light at the bottom of the background and aim upward. For a spotlight effect, use a snoot or grid to focus the light on a specific area behind your subject.
Light Modifiers and Their Effects
Softboxes and Umbrellas
These popular modifiers diffuse and enlarge your light source, creating softer shadows. Softboxes provide more directional control, while umbrellas spread light more broadly. The larger the modifier relative to your subject, the softer the light will be.
Reflectors
Reflectors bounce light back onto your subject, filling in shadows. White reflectors provide subtle fill, while silver ones create stronger, more specular reflections. Gold reflectors add warmth to your light, which can be flattering for portraits.
Grids and Snoots
These modifiers restrict light spread, creating a more focused beam. They're excellent for creating dramatic lighting with minimal spill onto other areas of your scene.
Gels
Colored gels change the color of your light, allowing for creative effects or matching different light sources. For example, use an orange (CTO) gel on a flash to match warm indoor lighting, or create mood with bold colors on background lights.
Advanced Lighting Techniques
Low-Key Lighting
Low-key lighting emphasizes shadows and creates a moody, dramatic look. Use a single light source with minimal fill, and position your subject to create strong shadow patterns. Black or dark backgrounds enhance the effect.
High-Key Lighting
High-key lighting minimizes shadows for a bright, airy look. Use multiple light sources, including background lights, and maximize reflection with white surfaces. This technique works beautifully for fashion, beauty, and product photography.
Rim Lighting
Positioning lights behind your subject creates a glowing outline that separates them from the background. This can be a subtle effect or the main lighting approach for silhouette-style images.
Butterfly Lighting
Named for the butterfly-shaped shadow it creates under the nose, this technique involves positioning a light directly in front of and above your subject. It's flattering for subjects with defined cheekbones and is a staple in beauty photography.
Practical Tips for Better Lighting
Learn to See Light
Before picking up your camera, observe how light falls naturally in different environments. Notice the quality, direction, and color of light throughout the day and in various settings.
Start Simple
Master one-light setups before adding complexity. Understanding how a single light source affects your subject builds the foundation for more elaborate lighting.
Keep a Lighting Journal
Document your lighting setups with diagrams and notes about what worked and what didn't. This becomes an invaluable resource as you develop your style.
Use the Histogram
Your camera's histogram helps ensure proper exposure across the tonal range. Learn to read it to avoid blown highlights or blocked shadows.
Experiment
Don't be afraid to break conventions. Some of the most striking images come from unexpected lighting approaches. Try unusual angles, mixed light sources, or creative modifiers.
Lighting is both a technical skill and an art form. As you practice these techniques, you'll develop an intuitive understanding of how to shape light to create the mood and effect you envision. Remember that great lighting doesn't call attention to itself—it serves the story you're telling through your photograph. With these foundations, you're well on your way to creating images that not only look professional but also evoke emotion and captivate viewers.